
Have you ever created a mind-blowing logo or design in Canva only to have your client email you back asking if you can send the design to them as a vector file?
Read this post to learn how to export your Canva logo to a vector file with this step-by-step tutorial on how to export from Canva to a vector file. Even beginners can use this Canva tutorial!
Exporting your Canva design as an SVG sounds simple… until it’s not. If you’ve ever downloaded an SVG from Canva and opened it in Illustrator, Cricut Design Space, or even just a browser, only to find that it looks completely broken, you’re not alone!
In this thorough guide, you’ll learn exactly how to export from Canva to SVG properly, fix common issues, and make sure your design is clean, functional, and ready to share, sell, or cut.
First, let’s establish what stage of panic you might be in staring at your Canva design right now.
How to Export from Canva to Vector
A. What even is a vector file? Canva doesn’t allow that option. Or…
B) I should have made this in Illustrator from the start…
If you find yourself in this situation, it is going to be okay. Say it with me: IT IS GOING TO BE OKAY!
Even if you created your design file in Canva but need to export the design as a vector file, you can still salvage your file AND make your client happy! (without having a complete breakdown or spending 2x the amount of time completely recreating your design).
Disclaimer: This post may contain affiliate links. This means I may receive a commission at no extra cost to you. I only suggest products I use and love.
Let’s Start With The Basics of Canva.
Canva is a great tool for creating quick and easy graphics that you can use on your website or social media platforms. With Canva, you can create a design without having any previous experience using Adobe Illustrator or Photoshop, which can be a daunting skill to learn.
Even though Canva is a simpler design tool than using Illustrator, you can still create beautiful designs to make the world more aesthetically pleasing (which, let’s be real, we all know is our true goal in life as graphic designers).
If you are not a trained graphic designer, Canva might be your jam. Canva’s drag-and-drop feature makes designing anything you need a breeze. Canvas also has many pre-made templates with tons of unique fonts, color palettes, and shapes to help get your creative juices flowing.
However, when it comes time to make changes in Canva or export Canva files into Adobe Illustrator for further editing, Canva does not allow you to export your file as an EPS or .ai file. Unfortunately, PNG files are not editable in Adobe Illustrator unless they are converted to a vector file.
Canvas’s PNG format has a pixelated appearance that looks good on websites but doesn’t work well in programs like Adobe Illustrator, where the artwork needs to remain high quality throughout editing processes.
I hear you. Canva can be limiting in the different ways you can export your files, but don’t give up yet! There’s always a way around any difficulties we run into. A lot of designers just starting out do not know about Canva’s limitations on exporting as a vector file.
Canva is the best tool for creating quick and easy graphics, but Canva’s PNG format can lose its high quality when exporting into Adobe Illustrator. Canva edits should be vectorized to maintain their original quality.
Please don’t feel hopeless or lost. You came to the right place, and we are going to teach you how to you can export files from Canva as vector files and designs!
Seasoned Graphic Designers Love/Hate (Hate/Hate?) Relationship with Canva.
Many seasoned designers are afraid to use Canva because they think there will be limitations on what types of files they can export their designs as.
Graphic designers also get hung up on the presumed limitations on their own originality and creativity, such as only being able to make logos and shapes from templates or only for social media platforms like Pinterest, Instagram, and Facebook.
In this case, most graphic designers stick with the tried and true Adobe Illustrator. And there is no problem with that. There are some types of projects that I wouldn’t dare touch Canva for, but for basic graphic design needs, such as social media content creation and PDF or eBook creation, Canva is a great tool!
What many people don’t know is that Canva’s workspace and user experience have been designed intentionally so that no matter which format you choose when you first create your Canva design file, you can still make changes to your file.
Canva features a resizing tool that allows you to resize any design at a moment’s notice with just one click.
Finally, you no longer need to waste all of those hours spent fussing over pixels and sizing at the beginning when the design was something basic, like squares or circles.
Download Your Canva Designs as Vectors with SVG File Type
Canva just released a new update that allows Canva Pro users to download their files as an SVG. Canva Pro users now have the option to download their designs as SVGs, in addition to Canva’s previous PNG, JPEG, and PDF options. For me personally, Canva Pro is worth it for this one feature alone!
Save time by downloading all of your Canva files as SVG vector graphic design files so you can edit them in Adobe Illustrator. Canva Pro members, go to your Canva Files tab and click “Export” on the file you want to download as an SVG vector graphic design file.
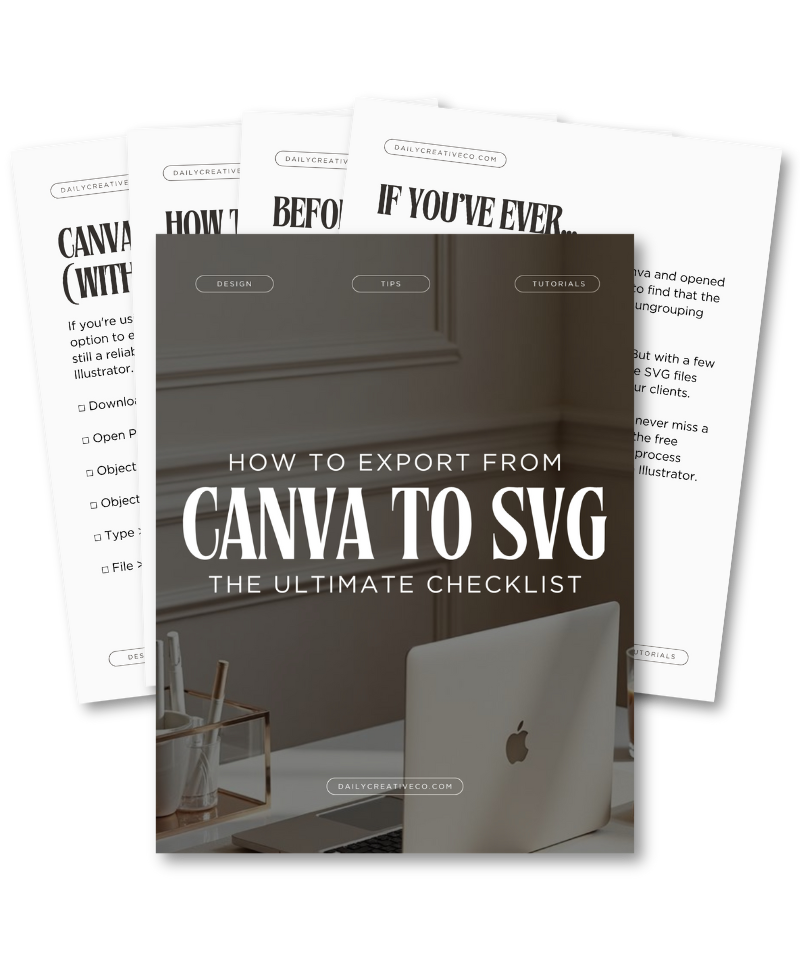
? Bonus: Download the free SVG Export Checklist below to follow every time you prep a file from Canva.
What is an SVG?
An SVG (scalable vector graphic) is a file type that uses math to describe an image rather than using pixels, so it can be resized without losing any quality. This means your Canva designs will look great no matter how big or small you make them, making them perfect for use on the web or in print.
If you are not a Canva Pro member yet (definitely worth it!), here is how Canva explains their new update:
“When Canva Pro was first launched, we promised that your Canva subscription would continue to grow and evolve based on your needs so you can create even more amazing designs without needing any additional tools.
The great thing about Canva Pro is that it’s not just for professional designers. With Canva, anyone can create beautiful designs, from your grandma who wants to make a birthday card for her friends, to the startup founder who needs to design a website on a budget.
Are SVG and Vector the Same Thing?
One of the most common questions people ask is whether SVG files are the same thing as vector files. If you’ve been confused by this, you’re not alone, and the answer is a little more nuanced than a simple yes or no.
SVG, or Scalable Vector Graphics, is indeed a vector file format. It uses mathematical paths, curves, and points instead of pixels, which is what allows it to be resized infinitely without any loss of quality. That means your design will look just as sharp on a tiny business card as it will on a billboard.
However, SVG is just one of several vector formats. Others include .AI (Adobe Illustrator’s native format), .EPS (Encapsulated PostScript, widely used for commercial printing), and .PDF (Portable Document Format, which can contain both vector and raster elements depending on how it’s saved).
Each vector format serves a slightly different purpose. SVGs are excellent for digital applications and lightweight for web use. They’re also commonly used with Cricut machines, Silhouette Studio, and similar platforms. On the other hand, .AI and .EPS files are more robust and ideal for professional printing and editing workflows. These formats often preserve color profiles, font embedding, and exact layout structures better than SVG.
Canva only offers SVG export (and only to Pro users), which is why many Canva designers default to it and refer to it as the vector format. But knowing the full landscape of vector file types helps you make smarter decisions depending on where your design is going and how it will be used.
Download Canva Designs As SVGs
What does this mean for designers? If you are already a Canva Pro user and use Canva to create your own graphics or templates that you then sell as an online course or download, you can now offer your customers the SVG file type in addition to Canva’s existing PNG, JPEG, and PDF options.
If you are not a Canva Pro member yet, I highly recommend upgrading so that you can start downloading your designs as SVGs! Not only will this save you time when editing your designs in Adobe Illustrator, but it also means you can create even more amazing designs without needing any additional tools.
Original YouTube Tutorial: How to Export from Canva to SVG
How to Export from Canva to SVG (Step-by-Step)
Exporting an SVG from Canva is easy—if you know what to expect.
- 1. Open Your Canva Design
- Use clean shapes, minimal effects, and commercially safe assets. Avoid layering too many elements or using complex filters.
- 2. Click “Share” ? “Download”
- This button is located in the upper-right corner of your Canva workspace.
- 3. Choose “SVG” from the File Type Dropdown
- This feature is only available for Canva Pro users. Free users won’t see SVG as an option.
- 4. (Optional) Check “Transparent Background”
- If you’re designing a logo, sticker, or file with a clear background, enable this before downloading.
- 5. Click “Download”
- Save the SVG to your computer. But don’t assume it’s perfect yet—we still need to clean and test it.
Why Canva SVG Exports Sometimes Break
You’ve followed the steps, downloaded your SVG, opened it in another program… and suddenly your file looks nothing like what you designed in Canva. Sound familiar? This is where most people get frustrated. So what’s going on behind the scenes?
Here’s what can go wrong:
- Fonts disappear or look totally different
- Design elements are flattened into a single layer or group
- Ungrouping is impossible
- Drop shadows, glow, and transparency effects don’t render properly
- Cricut Design Space throws an error or misreads your file
The reason this happens comes down to how Canva interprets your design when exporting to SVG. Canva isn’t built as a vector editor—it’s a user-friendly design tool that prioritizes ease of use. That means when it converts your design into an SVG (which is a complex code-based format), it often simplifies or merges elements to make them compatible, even if that compromises structure.
Clipping masks, font embedding, grouping structure—these all work differently in true vector editing software like Adobe Illustrator or Inkscape. So while your design may look right in Canva, the exported SVG may be bloated with excess code or missing key structure needed for clean editing or cutting.
If you’re using SVGs for Cricut, Silhouette, Glowforge, or sending designs to a printer or client, this structural mess can cause real problems. That’s why it’s so important to clean your file before final use.
Best Practices Before Exporting from Canva to SVG
To prevent export issues, follow these design guidelines from the start:
- Use basic fonts: Avoid Canva Pro fonts unless you’ll outline the text later.
- Avoid effects: No drop shadows, blur, or glow.
- Simplify layers: Keep your design flat and clean.
- Minimize groups: Group only what you need, and don’t nest groups.
- Test the file: Open the SVG in Illustrator, Cricut Design Space, or Inkscape to catch any problems before delivery.
Think of SVG exporting as part of your design process not an afterthought. Prepping your file properly will save time and frustration later.
What is Canva Pro?
Canva Pro is a premium Canva account that gives you access to extra features like more templates, fonts, stickers, animations, and backgrounds, all with unlimited downloads. With Canva Pro, you can also upload your own images and videos for use in your designs, and save Canva designs as PDFs, PNGs, JPEGs, and SVGs.
Can I Export to SVG without Canva Pro?
Yes, you can export to SVG without Canva Pro! You don’t need a Canva Pro account to export your designs as SVGs. If you are not chomping at the bit to upgrade your Canva account to a Canva Pro account, you can still able to export your designs from Canva as vectors by following these steps.
How to Fix & Clean Up Your Canva SVG File
After you download the SVG, here are a few cleanup steps to ensure it’s usable across platforms.
Option 1: Use Adobe Illustrator
- Open the file
- Go to Object > Clipping Mask > Release
- Use Object > Ungroup as needed
- Select text and choose Type > Create Outlines
This turns fonts into vector shapes, preserving their appearance even if the recipient doesn’t have the font installed.
Option 2: Use Inkscape (Free)
- Open the SVG
- Right-click and ungroup any grouped elements
- Use Path > Object to Path to convert text
- Save the file cleanly and recheck for errors
How to Export from Canva to Illustrator:
Before I learned this trick, I thought to myself… am I supposed to sit here copying every single element that I used in Canva into a new Illustrator file instead of exporting my Canva design to a vector file?
NO WAY. That method would take way too long and defeat the purpose of using Canva as a time-saving tool in the first place.
If you want to download your design from Canva and still be able to make changes to the design later on, it may not work out so well with Canva’s PNG export format due to its pixelated, uneditable nature.
So, what do you do now?!
To save your Canva files as high-quality files after being exported from Canva into Adobe Illustrator, they must be saved as a vector file (.ai or Adobe Illustrator file).
How to Export from Canva to a Vector File:
- Save your Canva logo or design file as a PDF.
- Open your file in Adobe Illustrator.
- Once in Illustrator, first you need to to release all clipping masks. Select all on your artboard, and then release clipping masks. Click: Layer > Release Clipping Mask.
- Delete any background boxes (same color as your background) around your design.
- Make sure you have deleted all of the boxes by selecting everything on the artboard and then click: View > Outlines.
- Now, vectorize your artwork and text. You do this by selecting everything on your artboard again. Click: Type > Create Outlines.
- Export your file. Click: File > Save As > chose either a “.ai” file or a “.EPS” file, depending on your preference. Ensure that you click “Transparent” for your background.
What is a vector file?
Vector files are very important when sending and receiving files from graphics designers because without them, printers will just print raster-based documents anyway, which might affect their branding more than desired or needed (and who wants unwanted ink stains?).
Understanding the difference between a vector file versus one created through traditional pixel design methods allows us to better understand how our designs look once printed out by various devices like desktop computers as well as mobile phones/ tablets, so it is crucial we know this information before submitting originals into production processes.
Vector images are different from raster images. A vector image uses a set number of points. In other words, if you want to print the picture at a larger size, it will stay crisp and clear because the points that make up the image will be bigger. Raster images use pixels to create an image, so if they are printed on paper at a larger size than what they were designed for, they may look grainy and ugly.
In a raster file, you can see the image made of pixels. If you print this at a size that is bigger than it was designed to be, then the pixels will grow and make the image look grainy. This is not good if you want to print an Instagram photo in poster size.
Vector images can be resized without problems. Thank goodness! Vector files can be edited at any time without loss of quality because each shape is its own separate object instead of being made up of many pixels.
If you save your logo in a vector image, then it can be printed on a billboard or on a pen. Vector images are files that people use when they want to print something that will not change size, no matter what.
What is an EPS File?
EPS stands for Encapsulated PostScript files. EPS files are used by Adobe Illustrator as a graphics format for vector images. You can export Adobe Illustrator files as EPS files, and an EPS file can be opened in various other programs, rather than just Adobe Illustrator.
EPS files are a thing of the past. It served us well back in the day, but it’s long been overtaken by PDF and .ai files. EPS has almost no place in modern graphics workflows.
EPS files have been surpassed by PDF and AI-driven graphics workflows that can produce more high-quality output with less time spent on printing/laying paper or drawing pen strokes onto a screen – even for highly specialized tasks like sending lithographs to print shops via fax machine!
What is a .ai (Adobe Illustrator) file?
A .ai file is the native format for Adobe Illustrator. It contains all of the information required to create a vector graphic, including shapes, paths, text, and images. The .ai extension stands for “Adobe Illustrator.” So what are the benefits?
It can be used to create all sorts of artwork, from logos and icons to complicated illustrations. A .ai file extension, or ai for short, is a type of graphic design file that contains vector graphics.
Vector graphics are made up of points and lines.
These files tend to be more precise than other formats, such as bitmap images (.jpgs). This precision makes them great for projects like logos that require precise details.
The benefit of using a .ai file in your design is that you are able to edit it on any computer with Adobe Creative Cloud installed without converting it into another type of file first. This means that there will be no loss of quality when you need to make changes or redraw portions of the image.
What is Adobe Illustrator? Is it an app?
Adobe Illustrator is a powerful software that allows you to create and edit your designs as vector graphics with ease.
Illustrator has many features to design anything from logos, flyers, or posters, as well as more complex projects such as illustrations made out of various types of paper – hello illustration workflows!
Do I have to be a trained graphic designer to use Adobe Illustrator?
If you’re a social media manager, Pinterest manager, or someone who has to design graphics for your blog posts, then you may have heard of Adobe Illustrator. Adobe Illustrator is a powerful software that allows you to create and edit your designs as vector graphics with ease.
Illustrator is capable of creating vector images that are highly scalable and can be used on websites and in presentations. It’s also a great tool for designers to use when they need to create logos without pixelation, aka vector files.
Can You Sell SVGs Made in Canva?
Yes, you can sell SVGs made using Canva, but there are some important rules and limitations you absolutely need to know.
Canva’s Content License allows for commercial use of designs that incorporate free and Pro elements, but only if those designs are transformed into something original. You cannot simply download a pre-designed template, make minimal changes, and list it on Etsy. That’s against Canva’s terms and could put your business at risk.
To be safe, make sure you’re:
- Creating your own layout and concept, not just rearranging Canva templates
- Using only free elements or Pro elements marked for commercial use
- Avoiding the resale of Canva-provided graphics, icons, or fonts as stand-alone or primary features
Fonts are another issue. If you use Canva fonts and export as SVG, those fonts often don’t carry over unless the viewer also has access to them. To make sure your buyer or user sees the correct design, you need to convert text into outlines or vector shapes. That way, even if the font isn’t installed, the shape stays intact.
You should also avoid overusing Canva illustrations or stock elements. Instead, combine them with your own hand-drawn graphics, purchased commercial-use elements, or original typography. The more you transform the design, the more you protect yourself, and offer something unique to buyers.
Selling SVGs is an incredible opportunity to grow passive income, but only if you do it right. Respect the licensing terms, double-check your file structure, and deliver polished, clean artwork. Your customers will thank you, and so will your business.
Viola! You Converted Your Canva Design into a Vector File!
Yay! *happy dance* You have successfully converted your first Canva logo or file into a vector file! This is going to be such a game-changer for you and your workflow. Now you can send your clients the final files as a vector (.ai) or EPS file in addition to .png files. Subscribe to my newsletter for all of my current tips and tricks about graphic design for social media marketing.
After reading this blog post, if you haven’t already, will you try out converting one of your designs from Canva into an Adobe Illustrator Vector File? Let me know below!
Related Posts:
- Canva Contributor vs. Canva Creator: What’s the Difference?
- 10 Best Fonts in Canva: A Guide for Designers
- Serif vs Sans Serif Fonts: What’s the Difference?


This is great information! I would have loved to have it when I first started Canva documents!
Thanks, Jenny!
As a new Canva designer, I’m really glad to know this information before I need it – now I won’t panic when I get this request. Thanks for sharing!
Thanks, Jenn! Definitely save this post for when you need it!
This is amazing! Thank you for breaking it down!
Thanks, Victoria! I am glad you enjoyed the post.
I pinned this to save my bacon in the future! Thanks for a great work around for this tough dilemma. I love designing in Canva, but there are some limitations like you said!
I saved this article because I know I will need this soon! Thank you
Thank you so much, Eva. I’m so glad it helped you!
I need to do this next week. Perfect timing! Thank you.
Awesome! I am so glad you found this post, Amanda!
This is great, thank you for sharing.
Thank you so much, Chantal!
Thank you so much for this great post. I have been wanting to do my logo in Canva and have been hesitating.
Thank you so much, Giangi! Please let me know if you have any questions.
THANK YOU so much for this!!!
You are so welcome!! I’m glad it was helpful!
Hi Jenny but this advice does not work for me. When the file is downloaded as an SVG, I cannot open it as I would usually open a pdf, jpeg or png. When I click on the downloaded SVG file, it directs me to a link and from this link I am also unable to save the file. I noticed that you just said to drag the file but you didn’t show that detail of opening the download. Can you please explain how to save the SVG file to my files like my other Canva downloads?I got the free trial for pro and I feel like it should do what you’re saying it should do.
Thanks.