
Have you ever wished you could use your own handwriting or a custom lettering style as a real, functional font inside Canva?
Whether you’re a designer, course creator, small business owner, or digital product seller, the ability to create your own font and use it across your designs is a total game-changer. Not only does it help you stand out, but it makes your brand instantly feel more personal, cohesive, and uniquely you.
And the best part? You don’t need to be a font designer or spend hundreds of dollars on pro tools to do it!
In this tutorial, I’m going to walk you through how to make your own font from scratch using free tools and then show you exactly how to upload that font to Canva so you can start using it in your brand designs immediately.
This is one of my favorite DIY brand upgrades. Let’s get into it.
This post may contain affiliate links. I only recommend tools I use and love. If you purchase through my links, I may earn a small commission at no extra cost to you.
What Is a Custom Font and Why Would You Want One?
A custom font is exactly what it sounds like: a font you’ve designed yourself. It could be based on your own handwriting, a signature script, or a unique set of letterforms you draw from scratch. The beauty of a custom font is that it reflects your personal or brand style in a way no standard font can.
Using a custom font in your designs creates a sense of authenticity. It’s like turning your voice into a visual element. For business owners, it becomes a memorable branding asset. For content creators, it helps your work feel more distinct. And for designers, it opens up new creative possibilities you can’t get with pre-made fonts.
Whether you’re building an online course, designing product packaging, or creating branded content for Instagram or YouTube, a custom font can elevate your aesthetic and make your visuals more recognizable.
What You’ll Need Before We Start
To follow along with this tutorial, you’ll need a few simple tools. First, a computer is essential. That’s where we’ll build and upload the font. Then, for actually drawing your letters, you have two great options:
- Traditional Method: Print a font template and draw each character by hand using a pen or marker.
- Digital Method: Use an iPad and draw directly in an app like Procreate (iPad Pro, Apple Pencil Pro).
You’ll also need:
- A free account on Calligraphr, the browser-based platform we’ll use to convert your letters into a font file.
- Access to a Canva Pro account. The font upload feature is only supported on Pro.
To stay organized and get smoother results, I also recommend these optional tools:
- Paperlike iPad screen protector for a paper-texture feel when drawing on iPad
- iPad drawing stand to keep your posture comfortable
- Mr. Pen .25mm Micro Pens if you’re drawing by hand
That’s it. No fancy equipment. No complicated software.
Tools You Can Use to Make a Font
There are a few popular tools for creating fonts, depending on your experience level and budget. Here’s a quick breakdown:
- Calligraphr: Best for beginners. It’s browser-based, free to use, and easy to learn. Perfect for personal handwriting or signature fonts.
- Procreate: While not a font creation tool, it’s ideal for drawing your characters digitally before uploading them to Calligraphr.
- Fontself, Glyphs, or FontForge: Advanced tools for designers who want complete control over spacing, kerning, and vector shapes. Not necessary for this tutorial.
For this post, we’ll focus on Calligraphr + Procreate because they’re accessible, intuitive, and free.
Step 1: Choose the Right Tool to Create Your Font
Start by visiting Calligraphr.com and signing up for a free account. Once logged in, you can generate a font template that includes boxes for each letter or character.
You’ll fill in these boxes to build your alphabet. Calligraphr then maps those shapes to actual keys, turning your artwork into a real font.
If you’re using the free plan, you can select a limited number of characters (usually uppercase, lowercase, and punctuation). It’s plenty for most use cases.
Step 2: Draw Your Letters by Hand (Digitally or on Paper)
Once your template is ready, it’s time to draw. You can do this:
- On paper: Print the template and use a black pen or marker to draw each letter. Keep strokes consistent, stay inside the box borders, and use smooth pressure.
- Digitally with Procreate: Import the template PDF into Procreate. Add a new layer and use a monoline brush to trace each letter. You can undo mistakes, tweak spacing, and control stroke thickness.
Either method works. Just choose the one that fits your workflow. The key is clarity. Your letters should be well-aligned, high-contrast, and consistent in size.
Take your time with this part. Your font’s style and readability depend on the quality of your drawings.
Step 2.5: Tips for Digitizing Handwriting for a Clean Font
Before uploading, make sure your lettered template is high-resolution and easy to read.
- For Procreate users: Export your design as a high-quality PNG or JPG.
- For paper drawings: Scan the page or take a well-lit, top-down photo using your phone. Avoid shadows or distortion.
A clean upload = a clean font. Check that all letters are visible, not cut off, and contrast well against the background.
Step 3: Upload Your Letters and Preview Your Font
Return to Calligraphr and upload your filled-in template. The platform will automatically detect and assign each character.
Once processed, you’ll see a preview of your font. You can type sentences to test alignment and balance. Use a sample sentence like: “The quick brown fox jumps over the lazy dog.” This lets you preview all 26 letters in a natural layout.
Notice anything off? No worries. You can tweak individual letters and re-upload the template. The process is super forgiving and easy to refine.
Step 4: Generate Your Font File (.TTF)
When your font looks good, it’s time to build the actual file.
Click “Build Font” in Calligraphr. You’ll be asked to name your font (choose something easy to remember), then select .ttf as your export format.
Why are we choosing a .ttf font file?
Because Canva accepts .ttf and .otf, but .ttf is universally supported and less prone to compatibility issues.
Download your font file and save it somewhere safe. That’s your official, working font — ready to install and upload anywhere.
What’s the Difference Between .TTF and .OTF?
- .TTF (TrueType Font): Best for compatibility. Works across platforms and is fully supported by Canva.
- .OTF (OpenType Font): Offers more advanced features like ligatures, but not always necessary unless you’re doing complex typographic work.
For Canva, always go with .ttf to keep things simple.
Step 5: Upload Your Font to Canva (Canva Pro Only)
This part is quick and exciting. In your Canva dashboard:
- Go to Brand Hub or Brand Kit
- Scroll to Uploaded Fonts
- Click “Upload a Font”
- Choose your .ttf file
- Confirm your rights (you made the font, so yes, you do!)
After a few seconds, your font will appear in the list. From there, you can use it in any design just like you would any native Canva font.
If you don’t have Canva Pro, you won’t be able to upload fonts. But you can sign up for a free trial to test this feature.
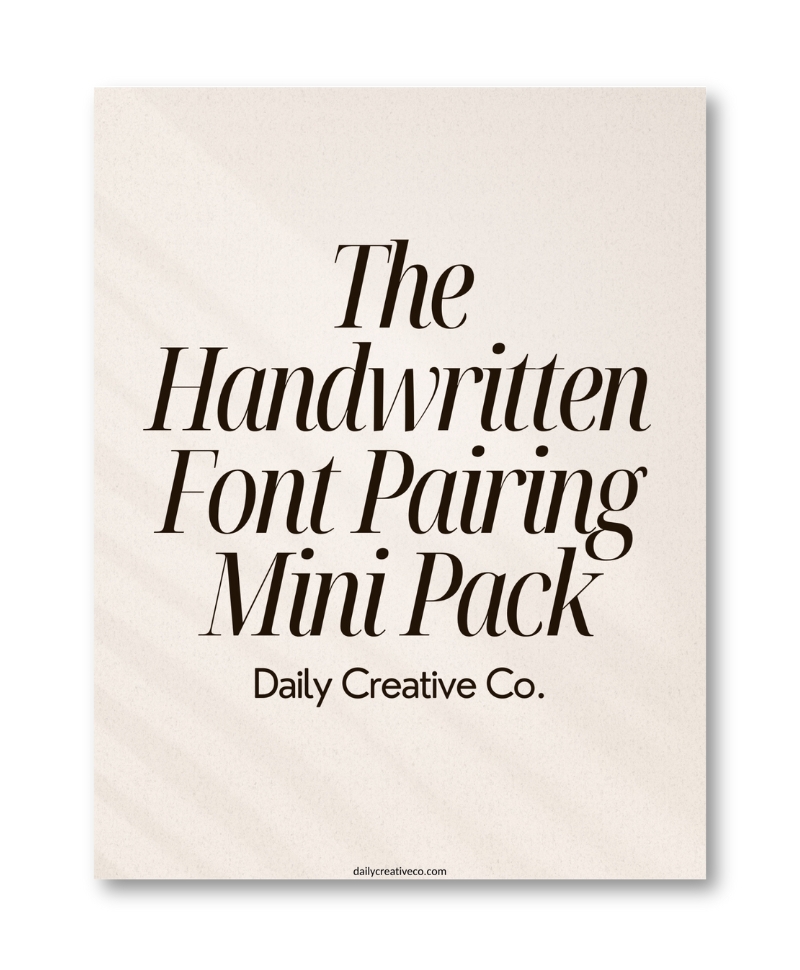
BONUS: Download the Free Handwritten Canva Font Pairing Mini Pack
A beautiful custom font is only as good as how you style it. That’s where font pairing comes in.
I created The Handwritten Font Pairing Mini Pack designed specifically for custom handwritten fonts. Inside, you’ll find:
- 3 curated font pairings that balance your script font with clean headings
- Editable Canva templates you can use right away
- A mini guide on where and how to apply each pairing
These combos work perfectly in:
- Instagram posts
- Course slides
- Pinterest pins
- Digital product mockups
Click here to grab your free Font Pairing Mini Pack!
Step 6: Start Designing With Your Custom Font in Canva
Now that your font is uploaded, you can start designing like never before.
Your custom font will show up in the font dropdown menu across all Canva tools. You can assign it to headings, logos, captions, overlays, or even your entire brand kit.
Want your brand to look polished?
Pair your new font with something simple like the fonts in The Handwritten Font Pairing Mini Pack that contrast to make your design easier to read and more visually striking.
Use your font in product mockups, freebies, workbooks, or even client deliverables. The possibilities are endless.
Common Questions About Uploading Fonts to Canva (FAQ)
Can you upload your own font to Canva?
Yes, but only with Canva Pro. You’ll need to upload a .ttf or .otf file through the Brand Kit section.
What font formats does Canva accept?
Canva supports .ttf, .otf, and .woff. I recommend .ttf for best results.
Can you do this for free?
Almost. The entire font creation process using Calligraphr and Procreate is free. You only need Canva Pro to upload the font.
Can you make a font using Procreate?
Absolutely! Procreate is perfect for drawing each letter digitally. Just export your completed alphabet as an image and upload to Calligraphr.
Watch the Full Video Tutorial for a Visual Tutorial!
Want to see this in action? I created a full YouTube video showing every step, from drawing to font creation to upload.
Watch the full video tutorial here!
Bonus: Use Your Custom Font in Digital Products or Etsy Listings
- Think beyond social media. Your new font can add value to:
- Digital planners and journals
- Workbooks and online course materials
- Etsy listing images and thumbnails
- Print-on-demand product mockups (Need one? Try Envato Elements)
Final Thoughts: Why This Matters for Your Brand
Creating your own font might sound like a fun creative project, but it’s actually a powerful branding tool. It brings consistency, personality, and originality to everything you design.
Your audience will recognize your style. Your products will stand out. And your visuals will feel more aligned with your mission.
Want more Canva templates, branding kits, and creative freebies? Sign up for my weekly Freebie Friday drops and get fresh design tools delivered to your inbox every week.
Let’s make your brand unforgettable.
Related Posts:
- How to Upload Fonts to Canva + Video Tutorials: (Pro, Mobile & Fixes for Every Issue)
- Canva Licensing Explained: A Complete Guide to Free, Pro, and Enterprise Use
- My Top 3 Canva Font Pairings This Month (With Free Templates!)
- How I Finally Nailed My Brand Design (Without Overthinking Everything)
- 5 Common Font Pairing Mistakes (and What to Do Instead)
- 3 Canva Time-Saving Tips You’ll Wish You Knew Sooner


Leave a Reply